This was such a fun and challenging project! The Level 1 AECP challenge is to create two card sets, one with a feminine flair and one with a masculine feel. Each set is to have 4-6 cards, look like an intentional set and be cohesive, include one recycled item per set, and use 3 techniques from the ten Level 1 classes that I completed. They must also be packaged as a gift set. ⚠️This is going to be a marathon of a post so grab your favourite cuppa and a comfy spot to sit and read! I will say it took a lot of cups of tea to write all this!
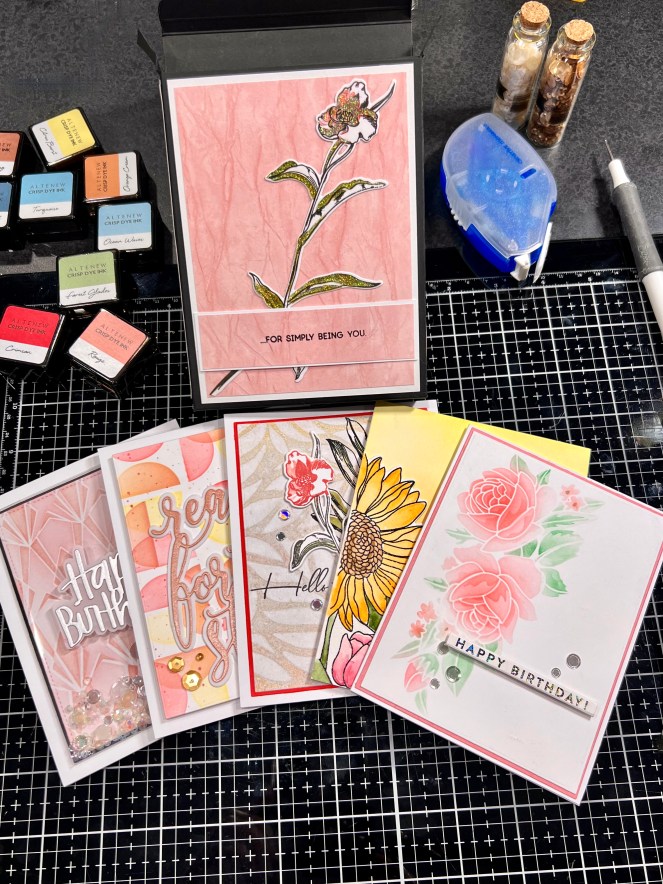
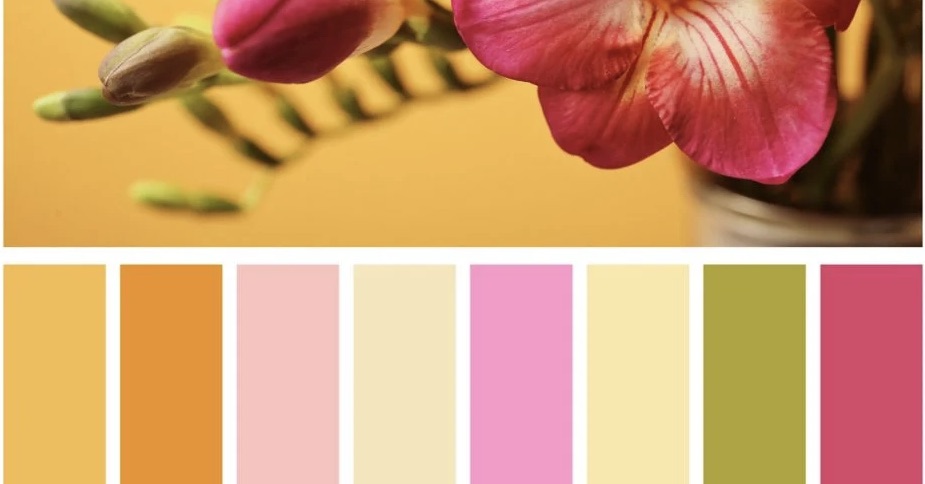
The first set I’ll show you is the feminine set. I’m very spoiled for choice with my inks as I have almost all of the Altenew Ink Collection. But I really loved the idea of a fun palette of colours to tie it all together and make each card unique within it. You can find part two here
The 3 Main Techniques for these Sets Are…
- 1. Easy Ink Blending Techniques – I love how well the Altenew inks blend and coordinate. They smooth out and give a wonderful end result. I really love how versatile inks can be and how much you can create with some basic quality supplies!
- 2. Celebrations: Stencil Techniques – A great stencil goes hand in hand with great inks and endless versitility. Stencils can be straightforward but they can also be used to emboss, use on a gel plate and you can use the positive or negative images.
- 3. Easy Die Cutting Techniques – I love sets that have coordinating dies and Sentiments with shadow dies. They can help pull together layouts and cards in a way that makes it very polished and striking.
- also included…
- Let it Shine – because what’s a card without a little bling?
- All About Layering 1 & 2 – the layering sets from Altenew are what got me hooked on their fabulous products!!
Card #1
Supplies For This Card
- Altenew inks
- Jet Black
- Crimson
- Rouge
- Forest Glades
- Sand Dunes
- Caramel Toffee
- Altenew Tall Foliage Stamp and Die Set
- Simon Says Stamp Floating Leaves Stencil
- Simon Says Stamp Moonshine Confetti
- Geli Press gel plate
- Arteza paint – metallic bronz
- Creative Memories Cardstock – Red
- WaffleFlower A2 layering dies
- Art Glitter Glue
- Hammermill 80 lb cardstock
- Accent Opaque 100 lb cardstock
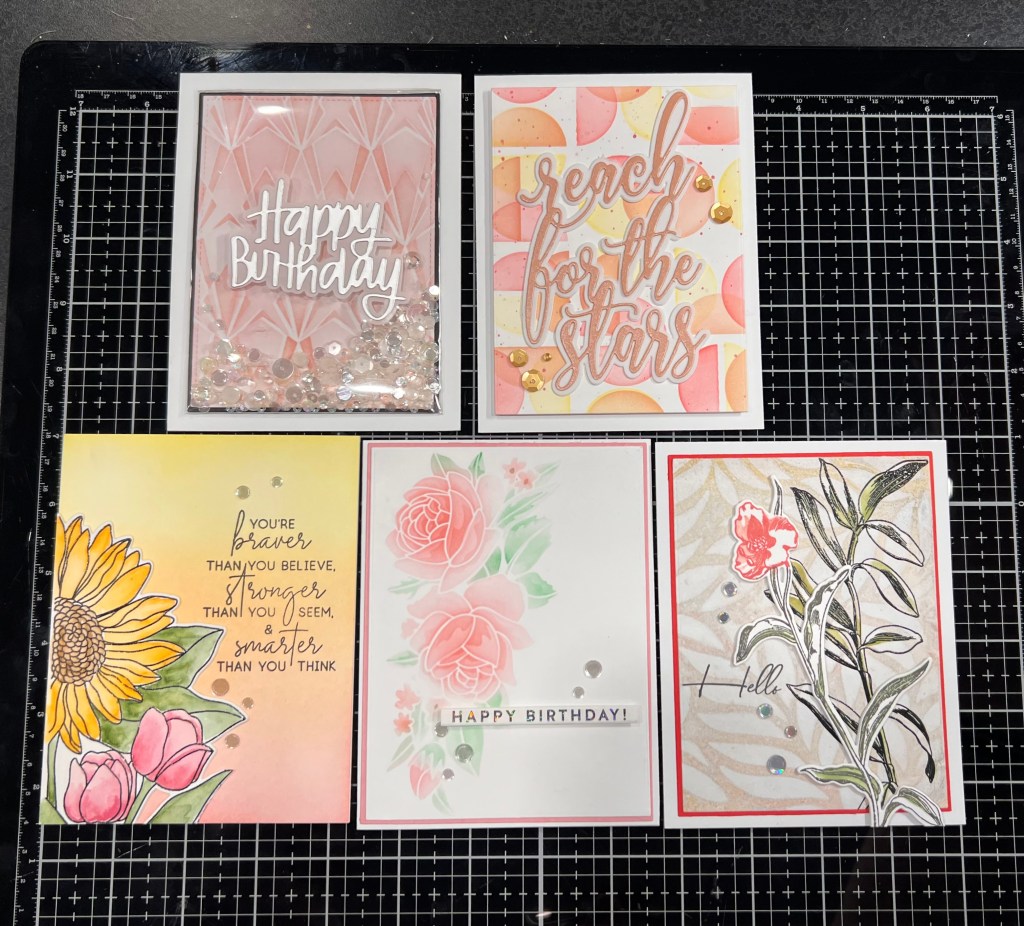
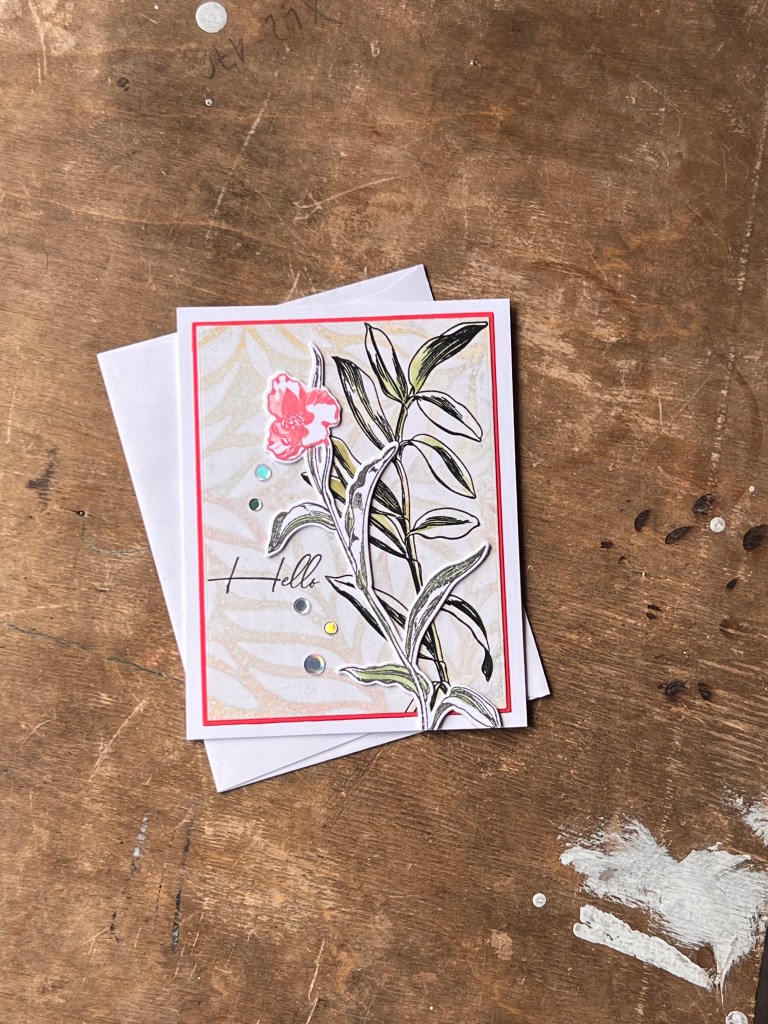
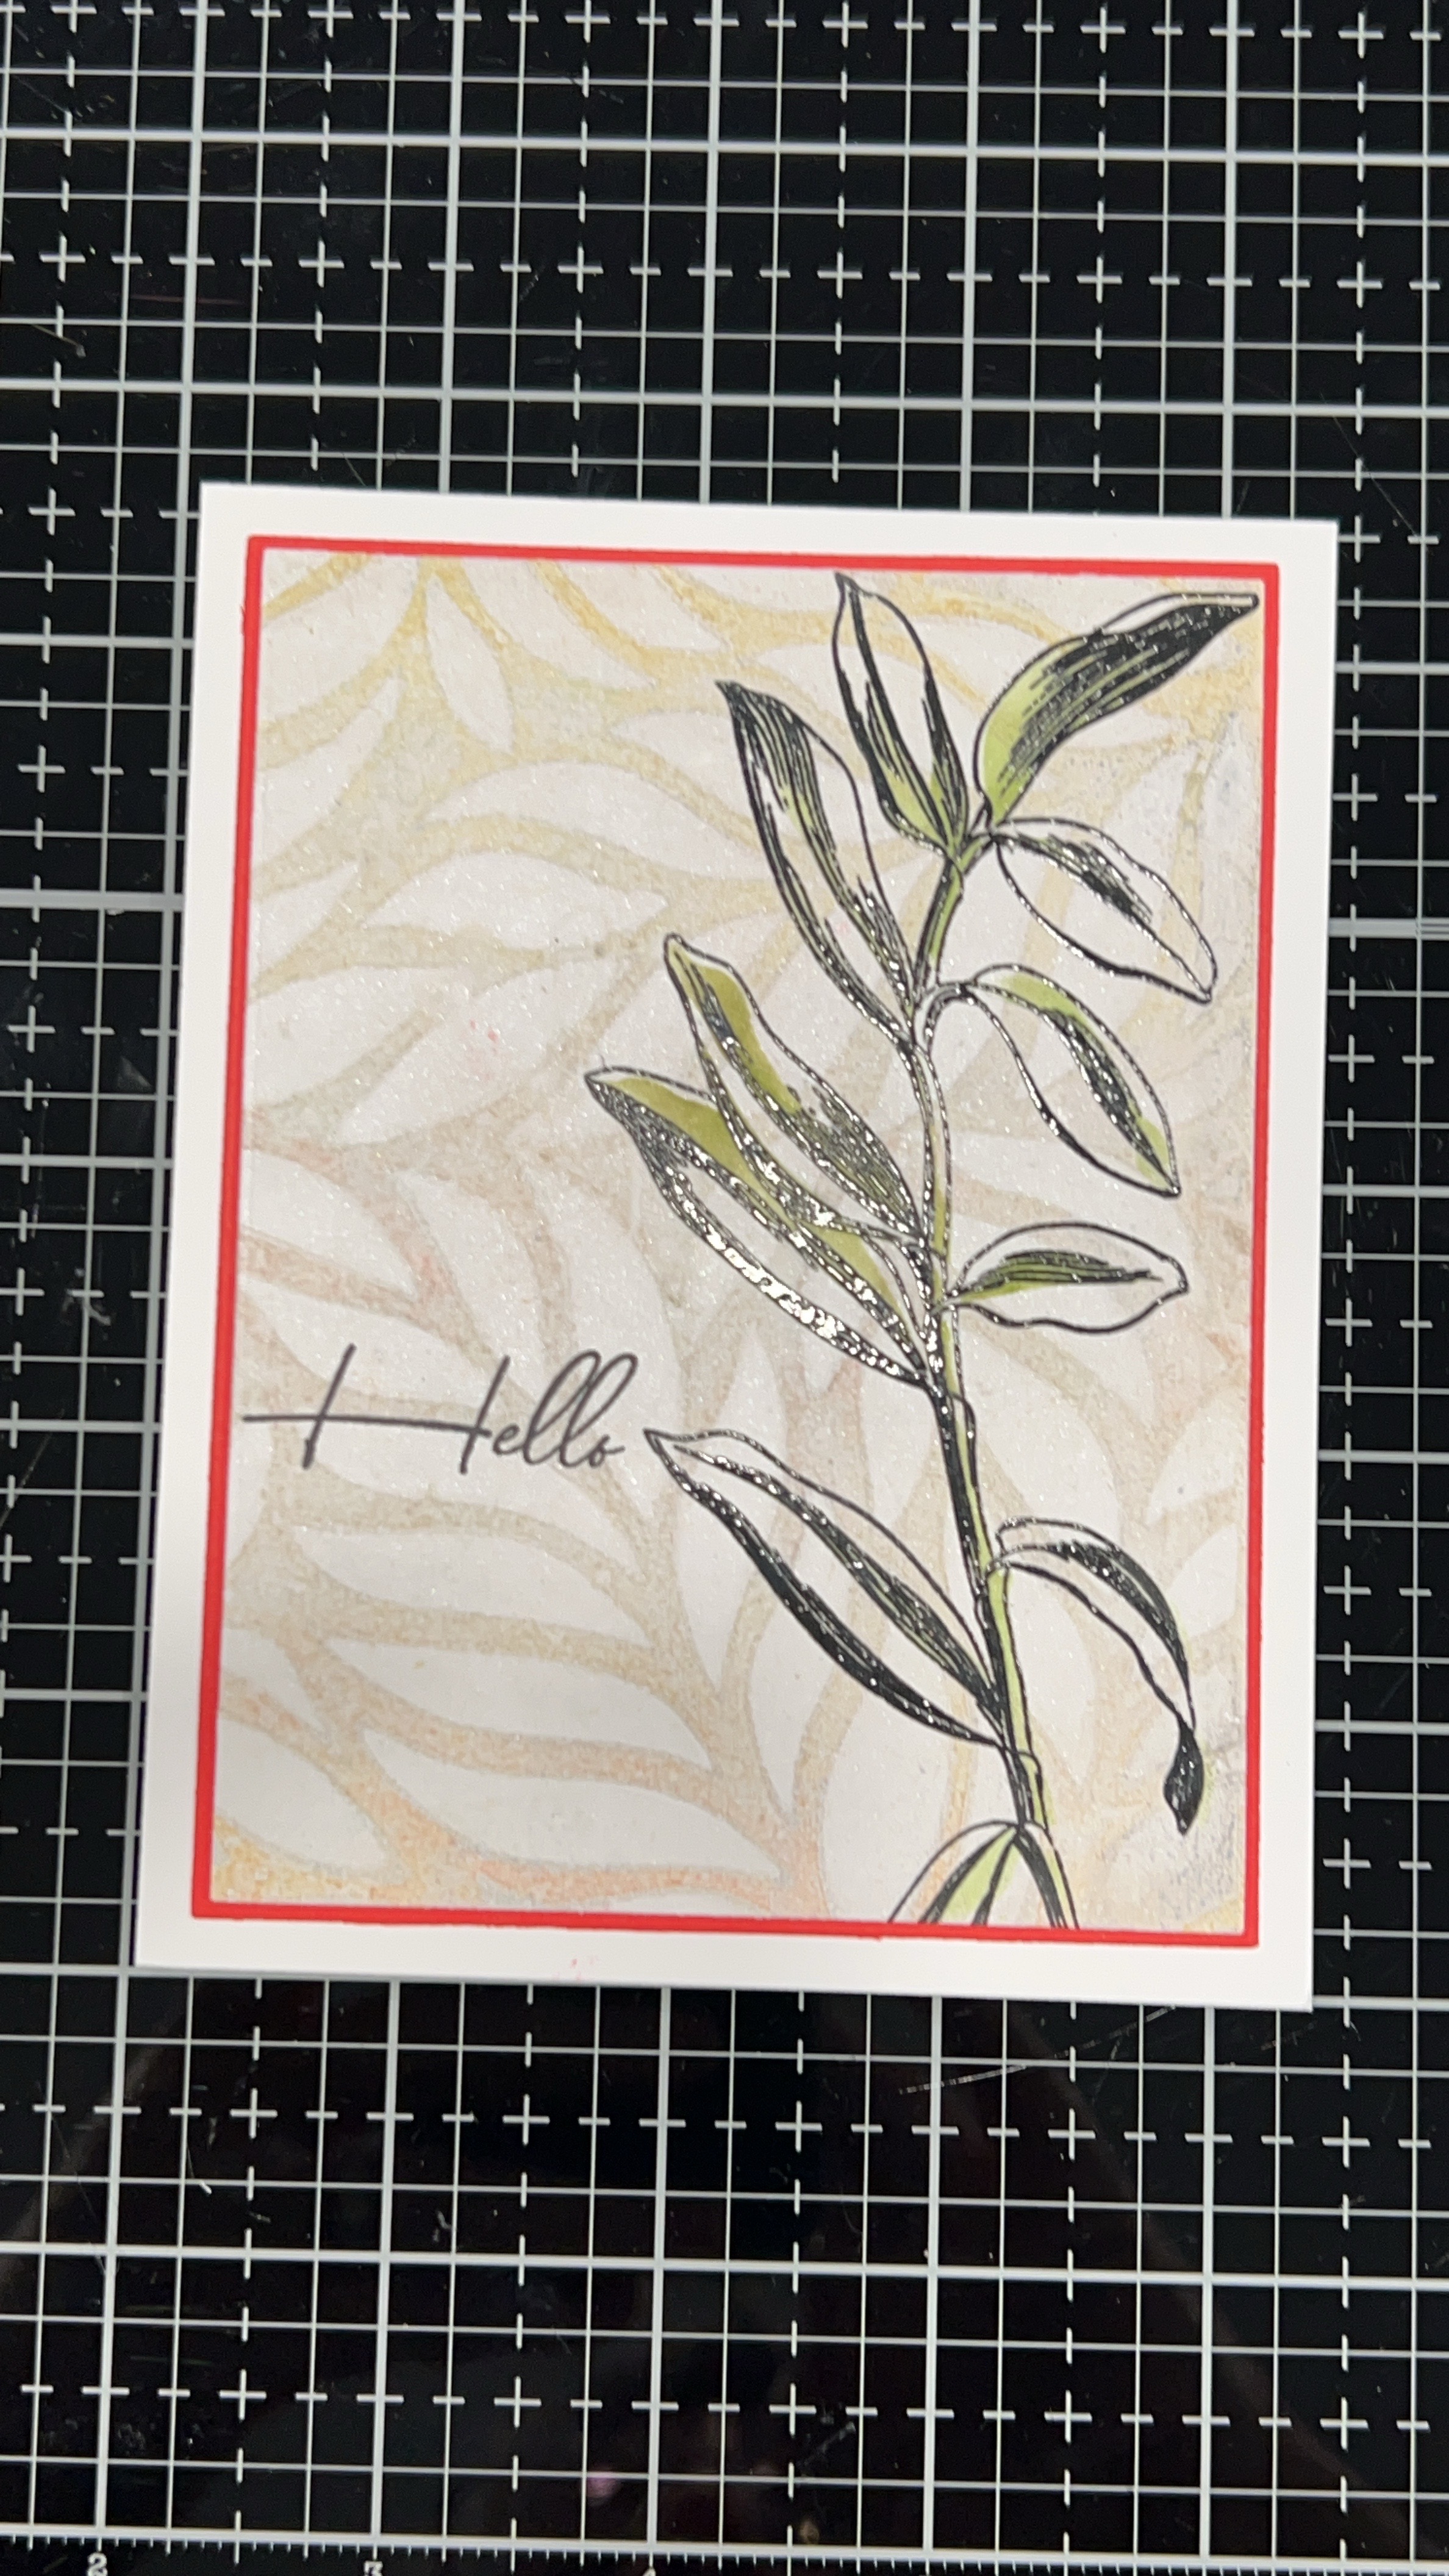
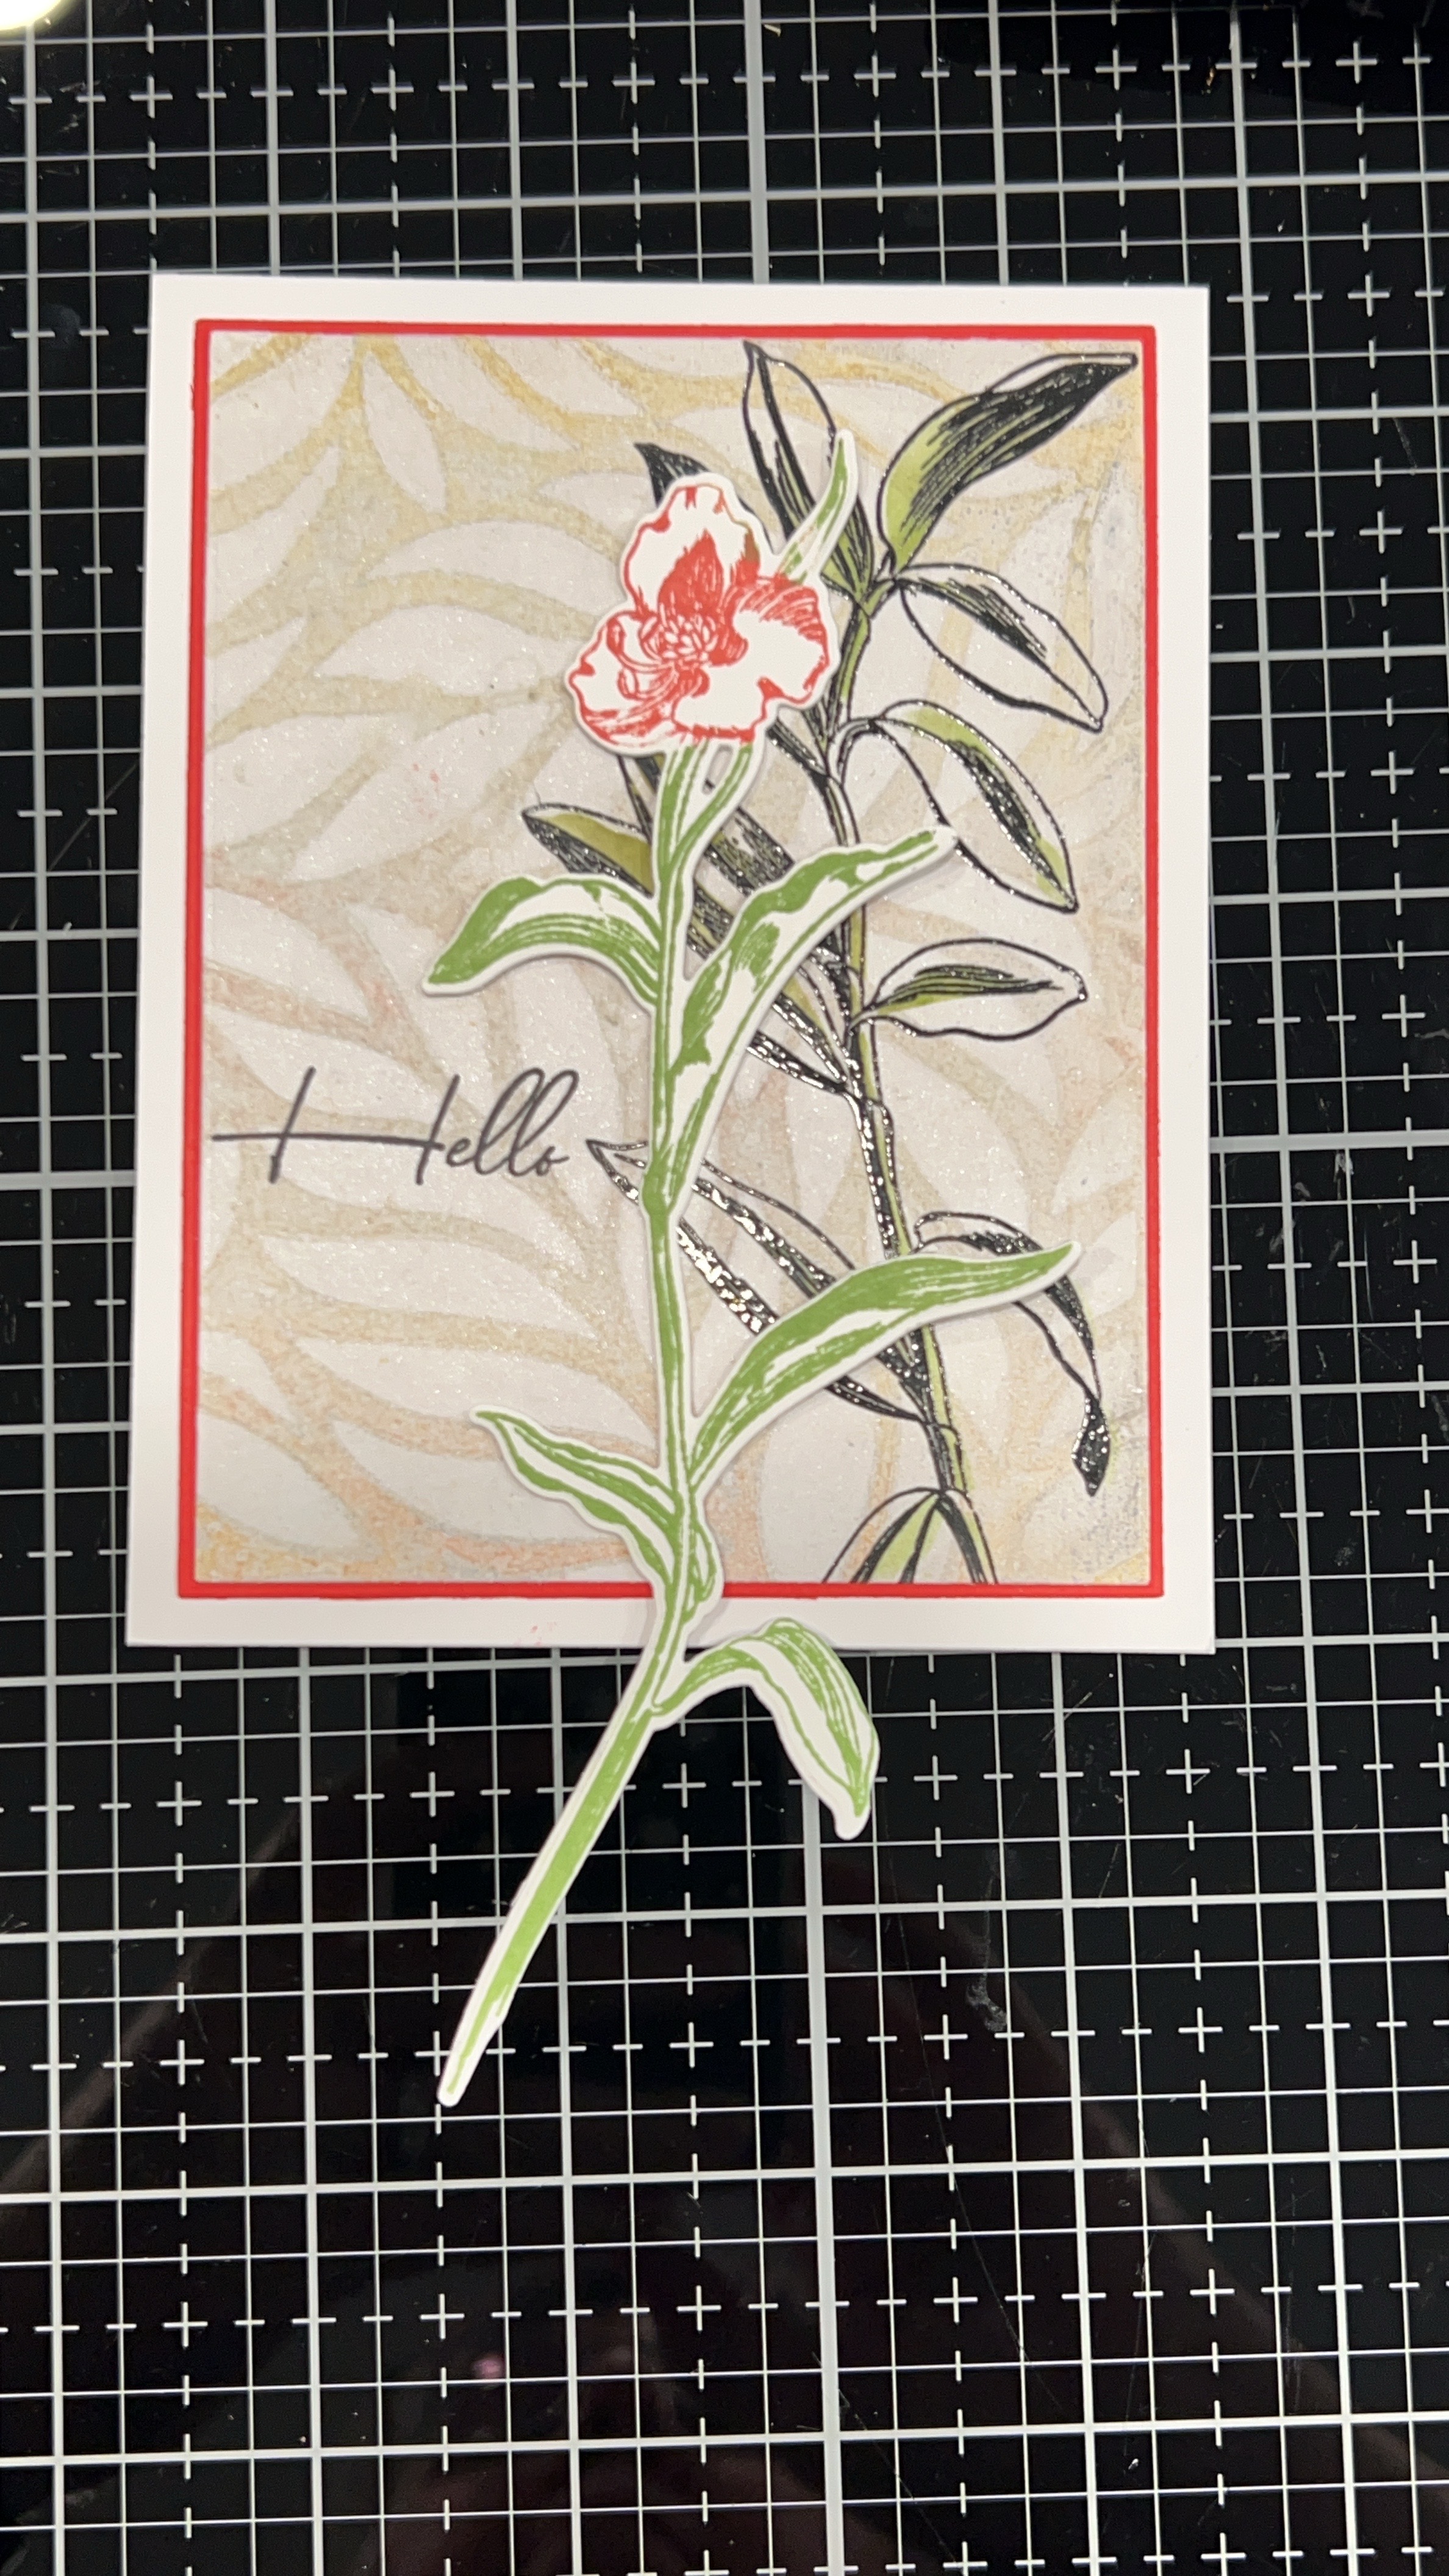
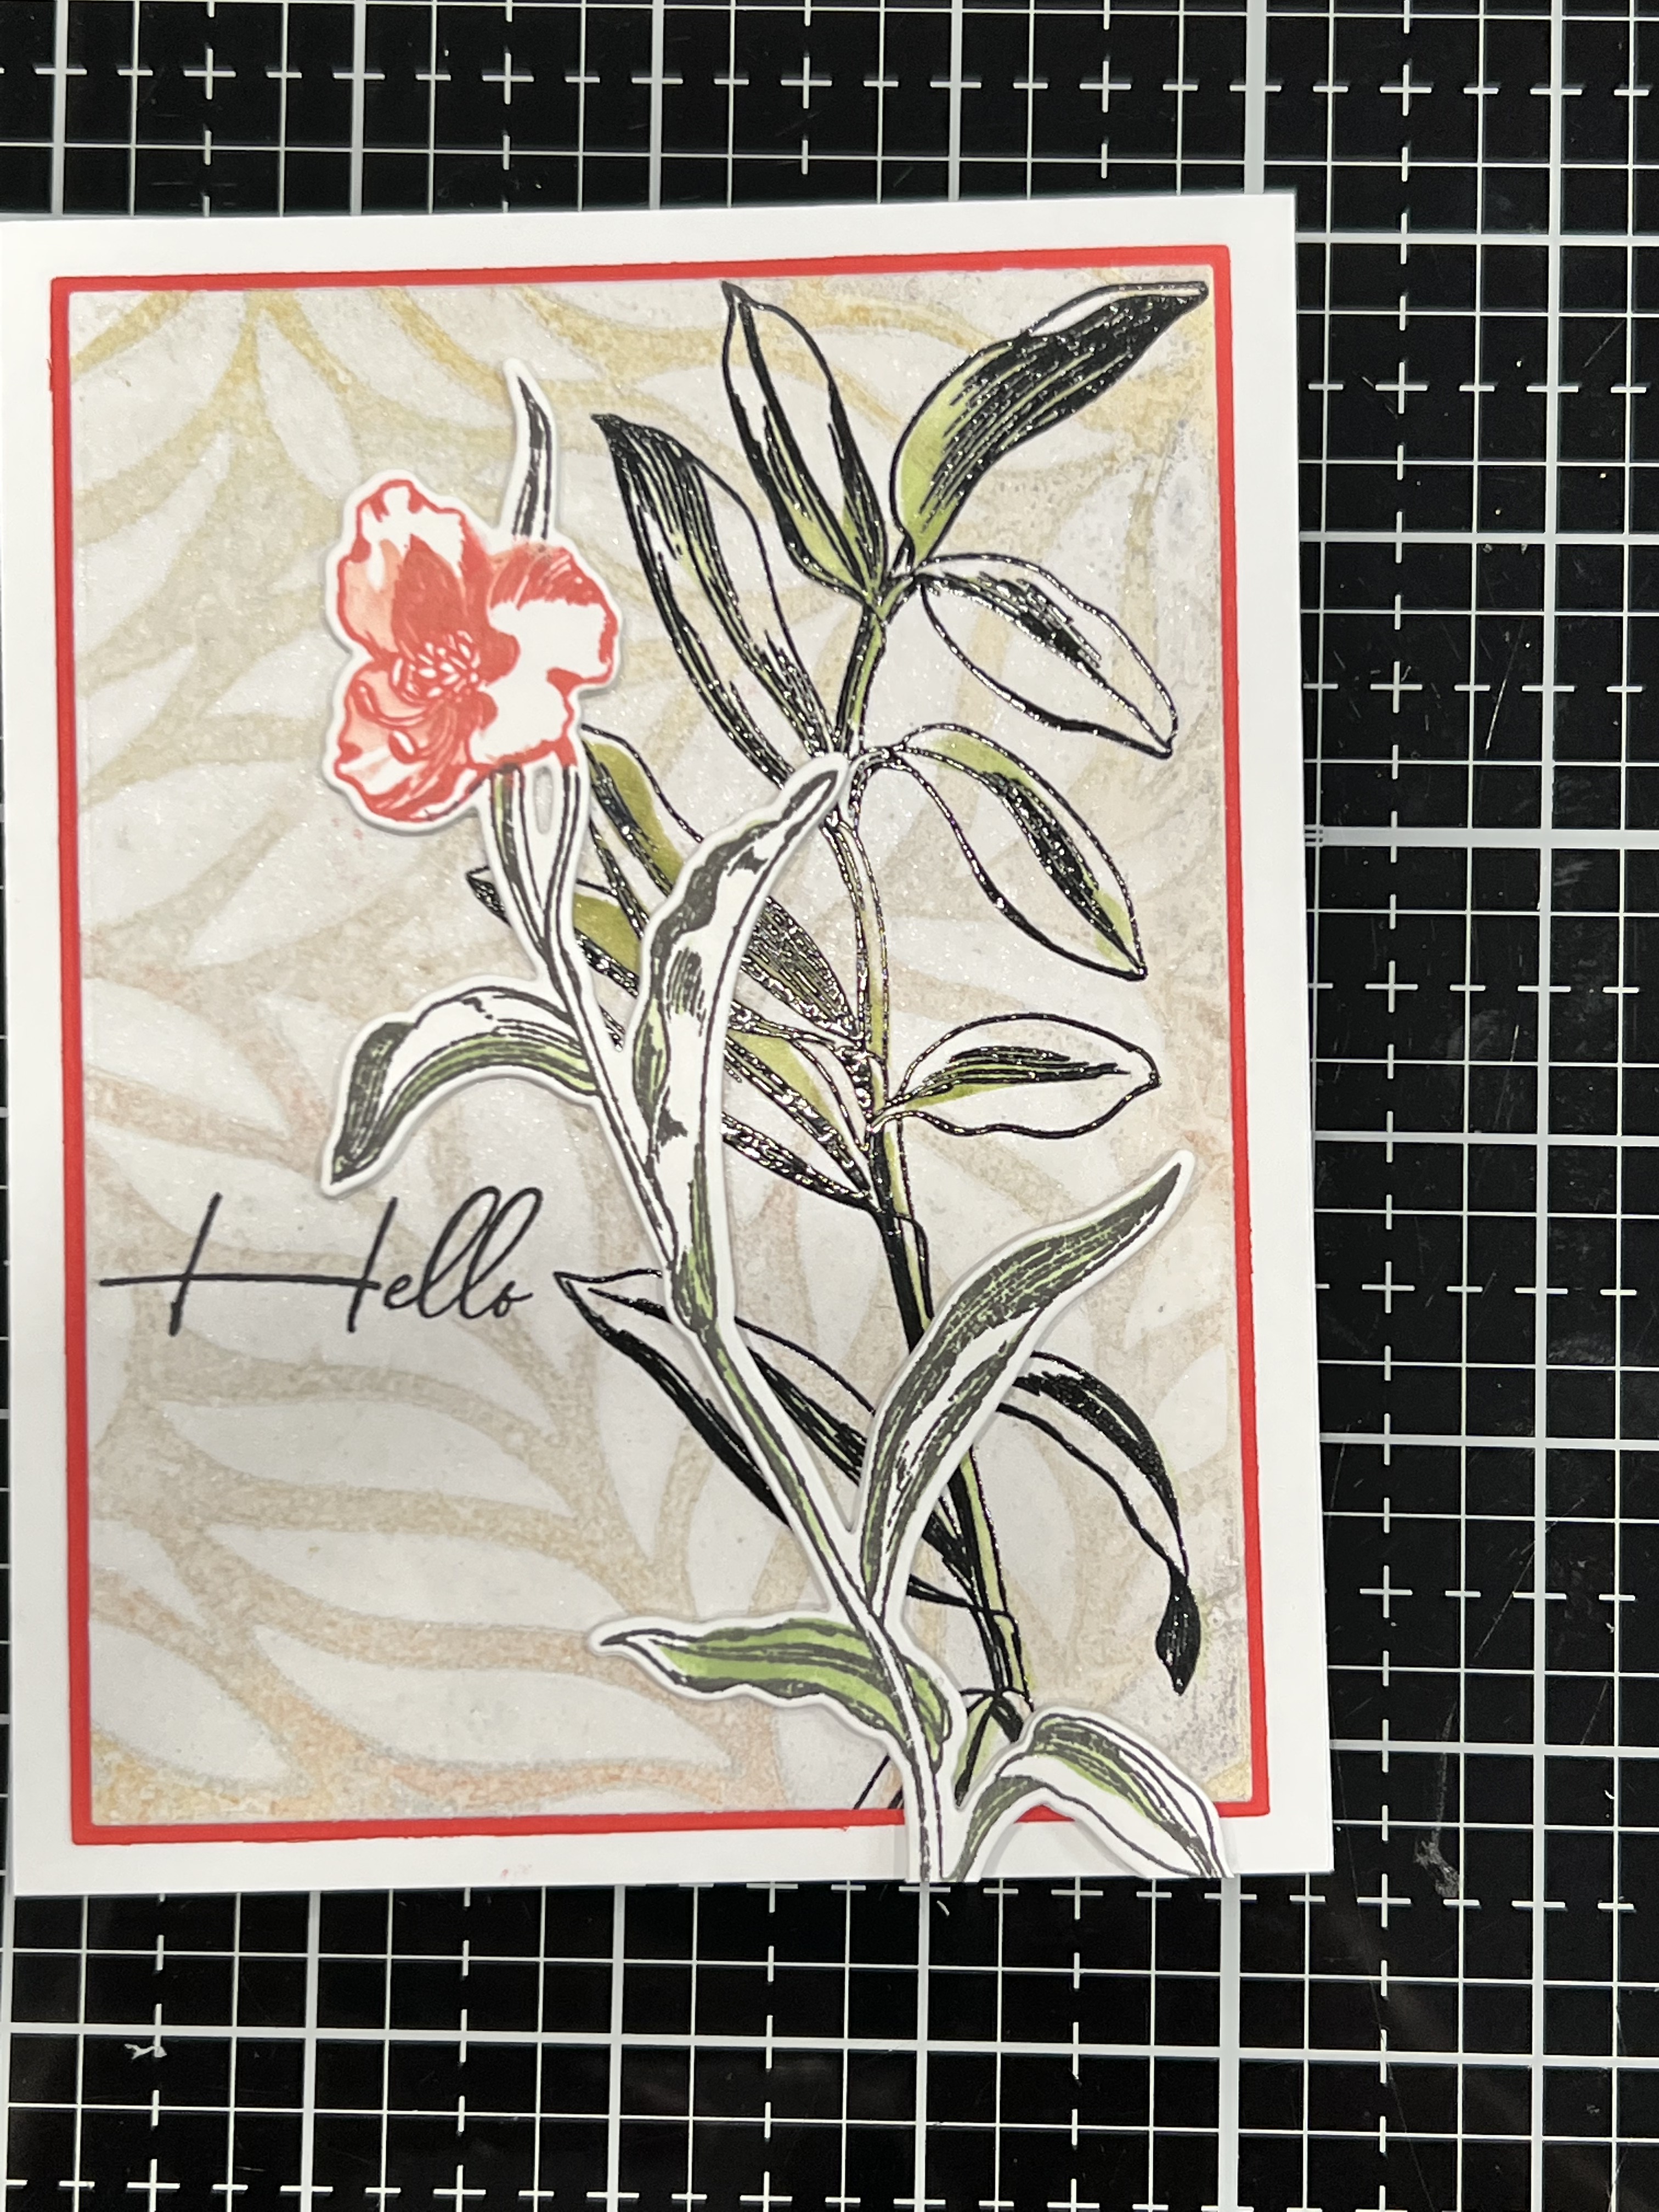
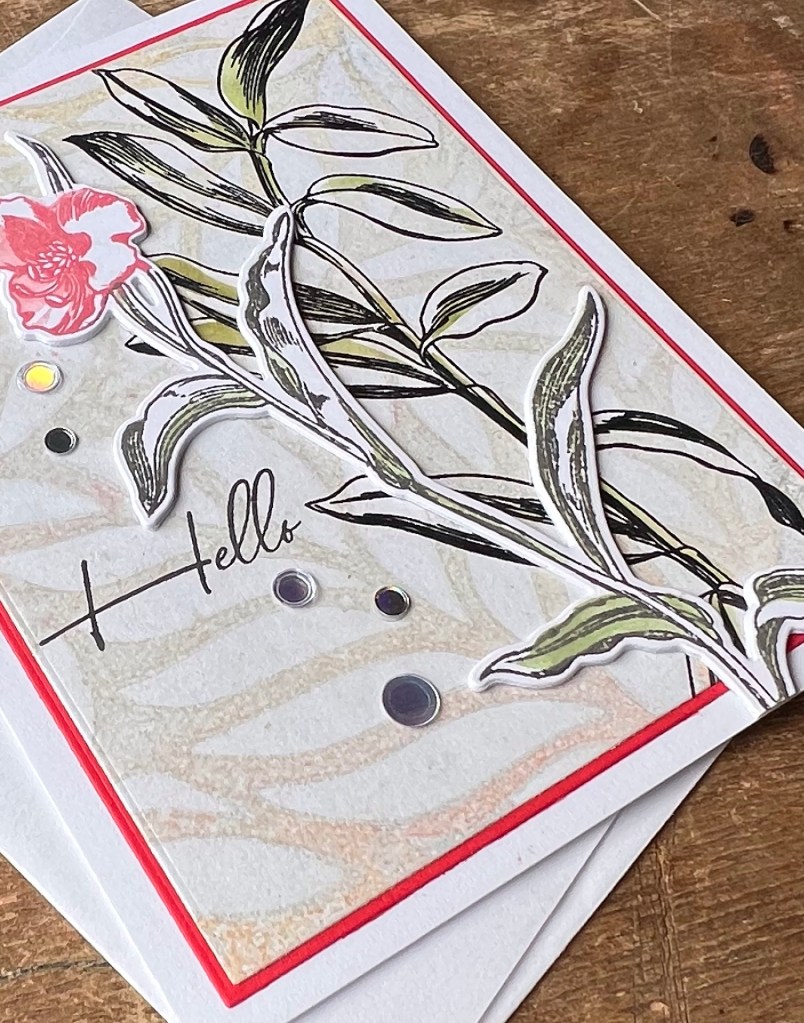
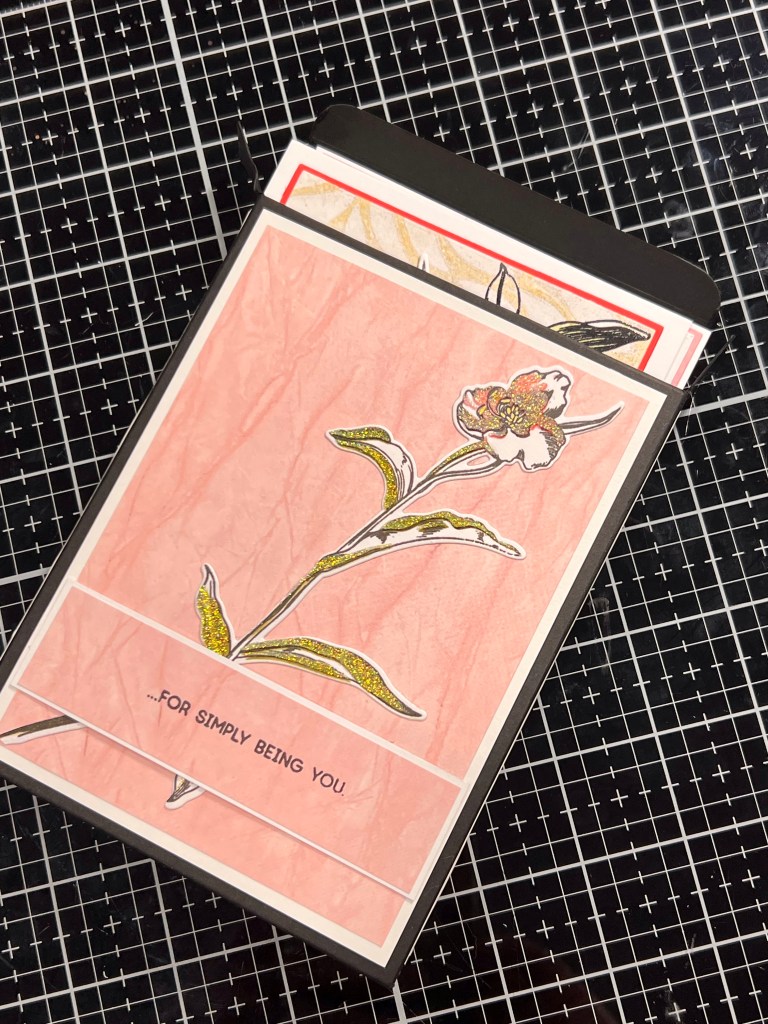
To make this A2 top fold card I started with a negative print made on a gel press using Sand Dunes and Caramel Toffee inks and some Arteza metallic bronze paint. I tend to make dozens at a time when I pull out the gel plate, inks and paints using either Neenah Classic Crest 80lb or Hammermill 100lb cardstock. I cut the panel to 5” x 3 3/4” using a WaffleFlower A2 Layering set. On the panel I stamped the stem from the Altenew Tall Foliage set in Altenew Jet Black ink and clear heat embossed it immediately. Using the matching stencil set I ink-blended the stem with Forest Glades ink. I matted the panel using Creative Memories red cardstock cut to 5 1/8” x 3 7/8” using the Waffleflower Additional A2 Layering Set and centred that on an A2 card base made of Accent Opaque 100lb cardstock. I then stamped the floral stem from the same set and ink blended with Rouge, Crimson and Forest Glades inks. Cutting it out with the matching die I placed it on the front loosely so i could position the Hello stamp from the same set and stamp it in Jet Black ink as well. I made 2 blank die cuts of the same flower from scrap cardstock (recycling paper this way) that had miss stamped images on it. I do this to create dimension by gluing together several layers. This was attached it to the card with Art Glitter Glue liquid adhesive. I intentionally placed it in such a way as to go past the edges of the top panels for added interest and texture. A last touch is a bit of bling scattered around the sentiment. I love the Moonshine confetti because it goes with almost everything!
Card #2
Supplies For This Card
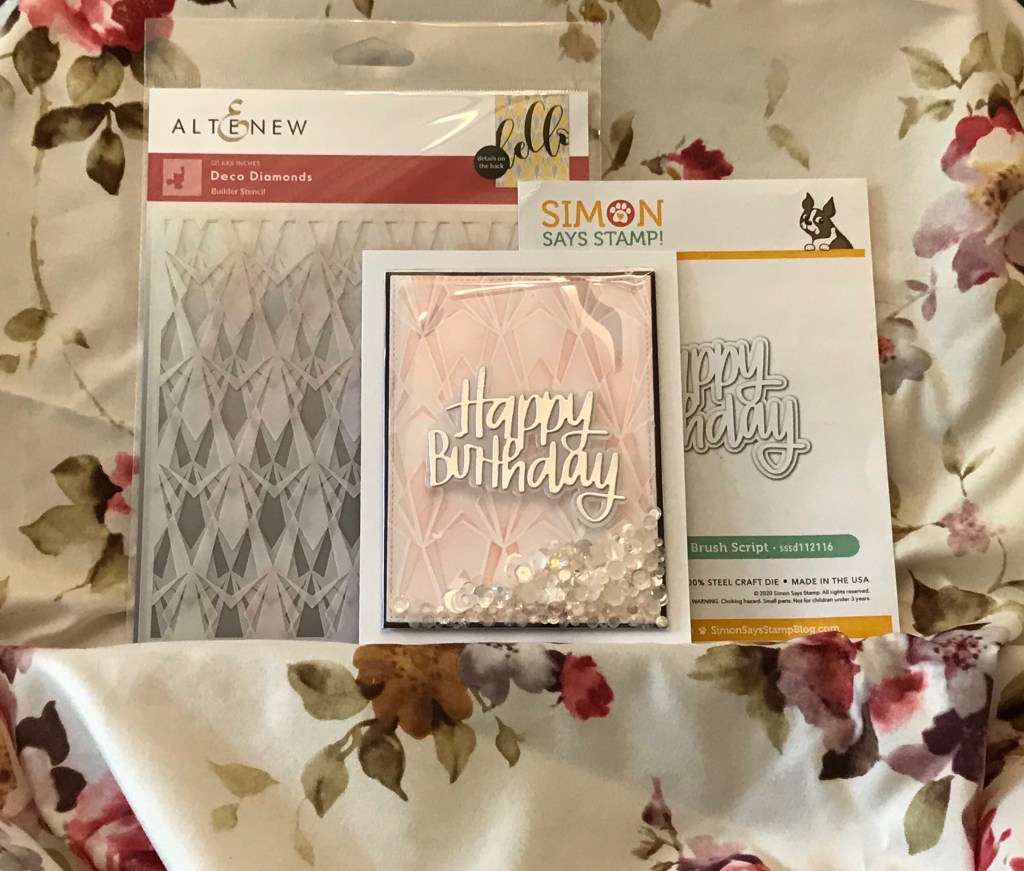
- Altenew Deco Diamonds Builder Stencil
- Altenew inks
- Rouge
- Crimson
- Altenew Brushed Silver Metallic Cardstock
- Simon Says Stamp Happy Birthday Brush Script die set
- Recollections Vellum
- Creative Memories Velum tape runner
- Simon Says Stamp Moonshine Confetti
- Studio Katia Wedding Belle Mix bling
- Altenew Satin White Sequins
- Waffleflower A2 Layering dies
- Waffleflower A2 Additional Layering dies
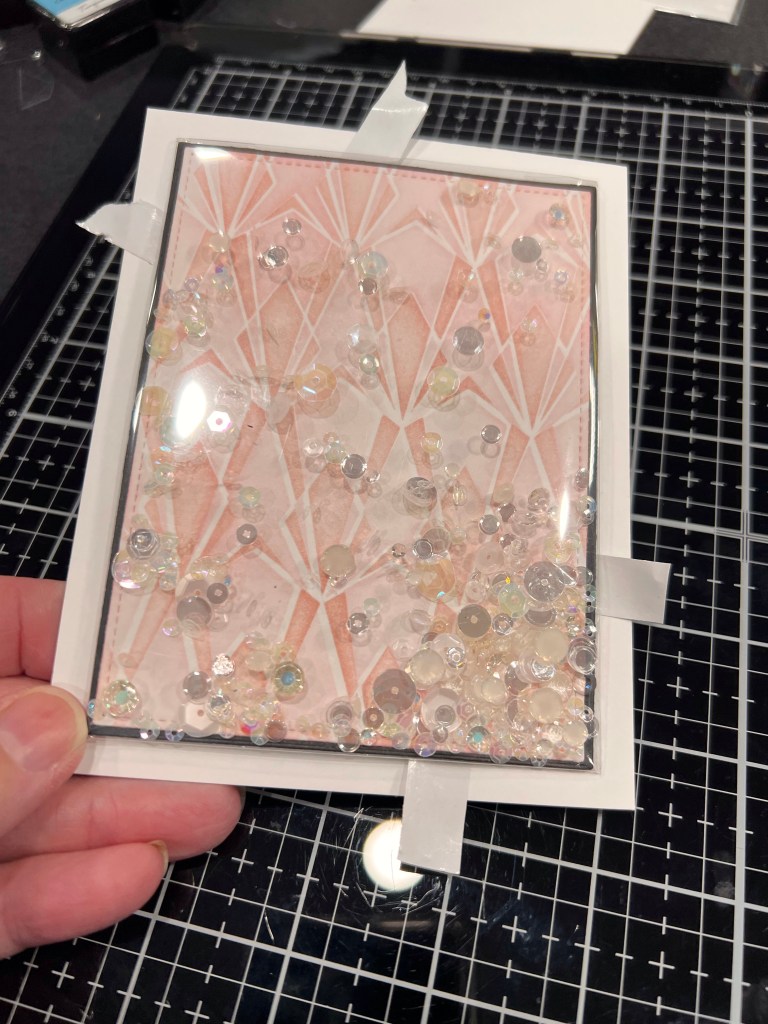

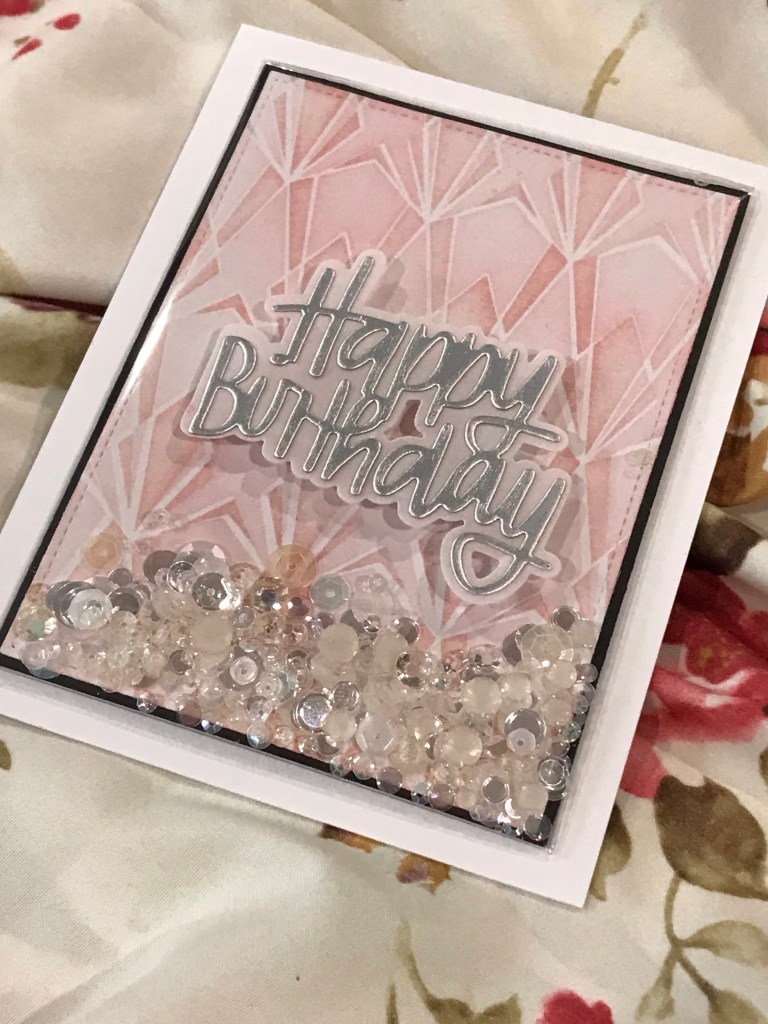
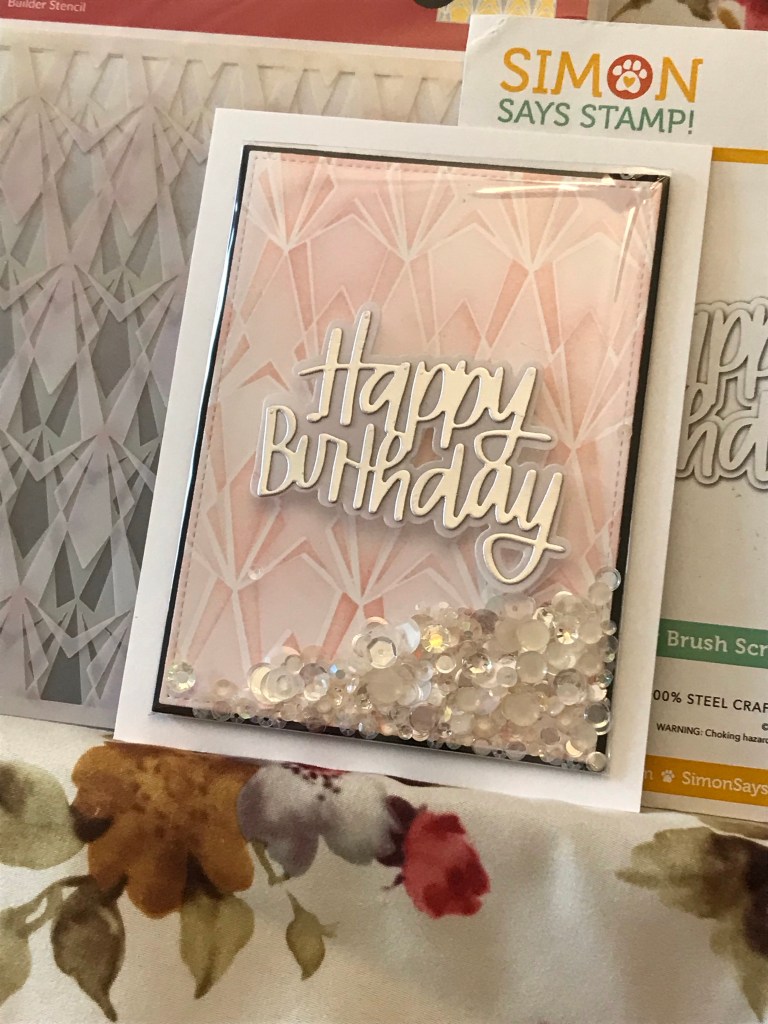
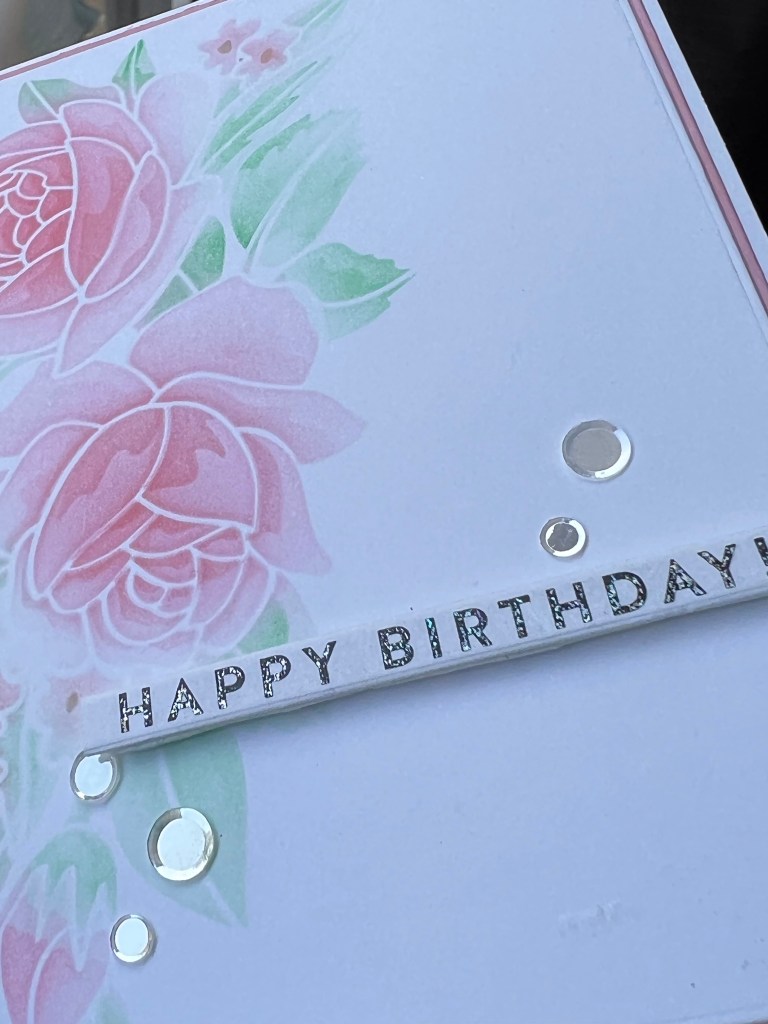
For this A2 top folding card I started with a 4 1/4 x 5 1/2 piece of Neenah Classic Crest Solar White in an 80lb weight. Using Rouge and Crimson inks I blended the two layers of the Deco Diamonds stencil. I really loved the soft retro feel that was created. Using the 3 5/8 x 4 7/8 die from the Additional Layering set I cut a black mat for the 3 1/2 x 4 3/4 blended panel. I created a full shaker front for the panel, using repurposed packaging and filled it with the 3 kinds of sequins listed in the supply list above. I used a strong double sided tape to attached the acetate to the panel and to attach the panel to the card. My favourite tip for adding panels to card fronts is to only peel back a small part of the tape from each corner, once you have placed it down you can then peel off each strip easily. This tip really helps me get great placement. I cut the Happy Birthday die from matte silver cardstock and the shadow layer from velum. I find this allows the background to shine and yet let’s the sentiment show nicely. I attached the sentiment to the card front with a velum tape runner from Creative Memories then added it to the Accent Opaque card front.
Card #3
Supplies For This Card
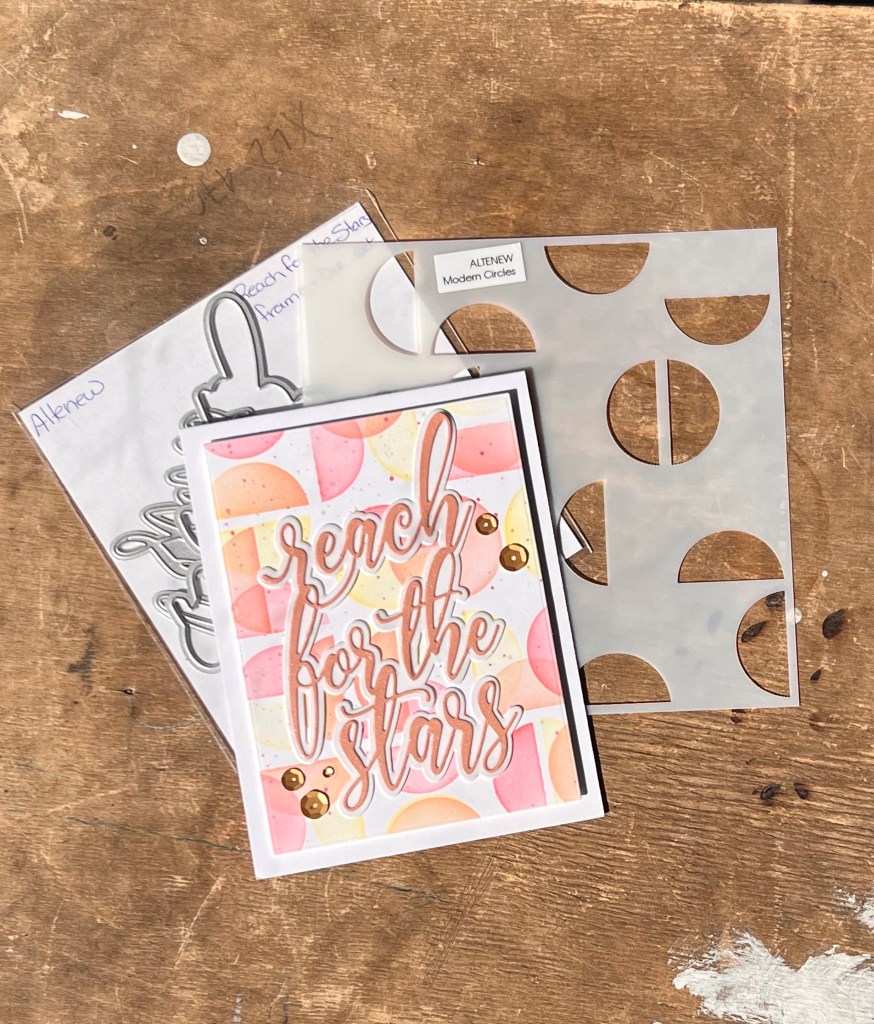
- Altenew Modern Circles Stencil
- Altenew inks
- Rouge
- Orange Cream
- Citrus Burst
- Enchanted Gold Pigment Ink
- Altenew Reach for the Starts die set
- Altenew Satin Gold Sequins
- Recollections Rose Gold Shimmer Paper
- Waffleflower A2 Layering dies
- Waffleflower Watercolor Media Mat
- Accent Opaque 100lb Cardstock
- Neenah Solar White Classic Crest 80lb Cardstock
- Art Glitter Glue liquid adhesive
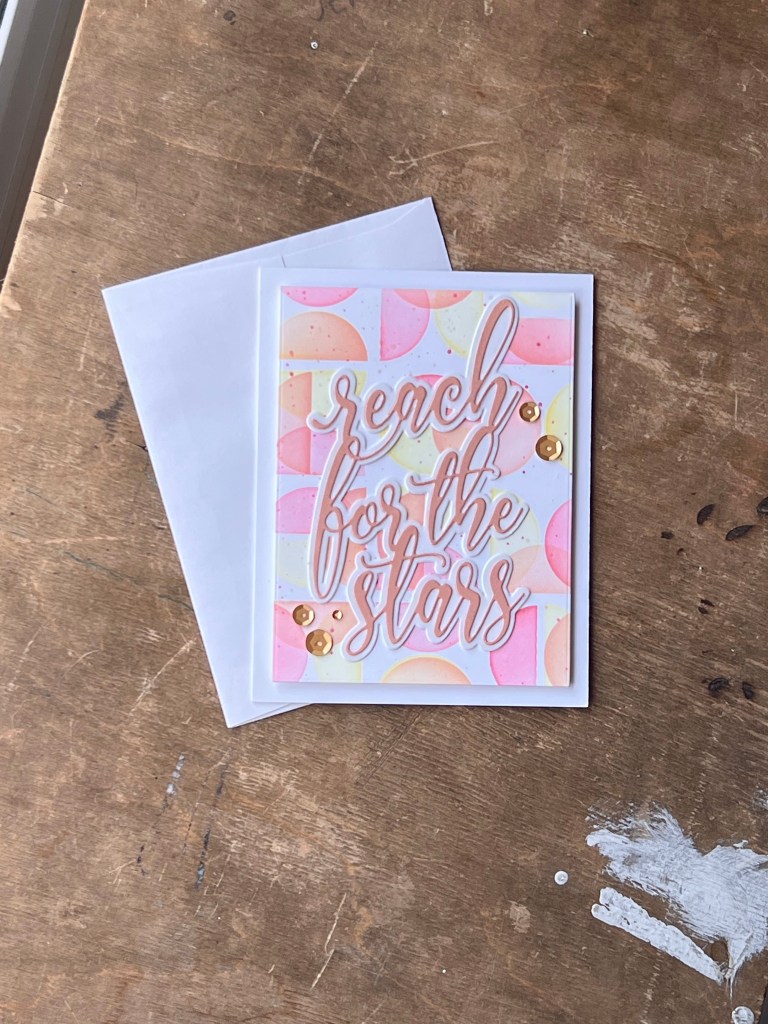
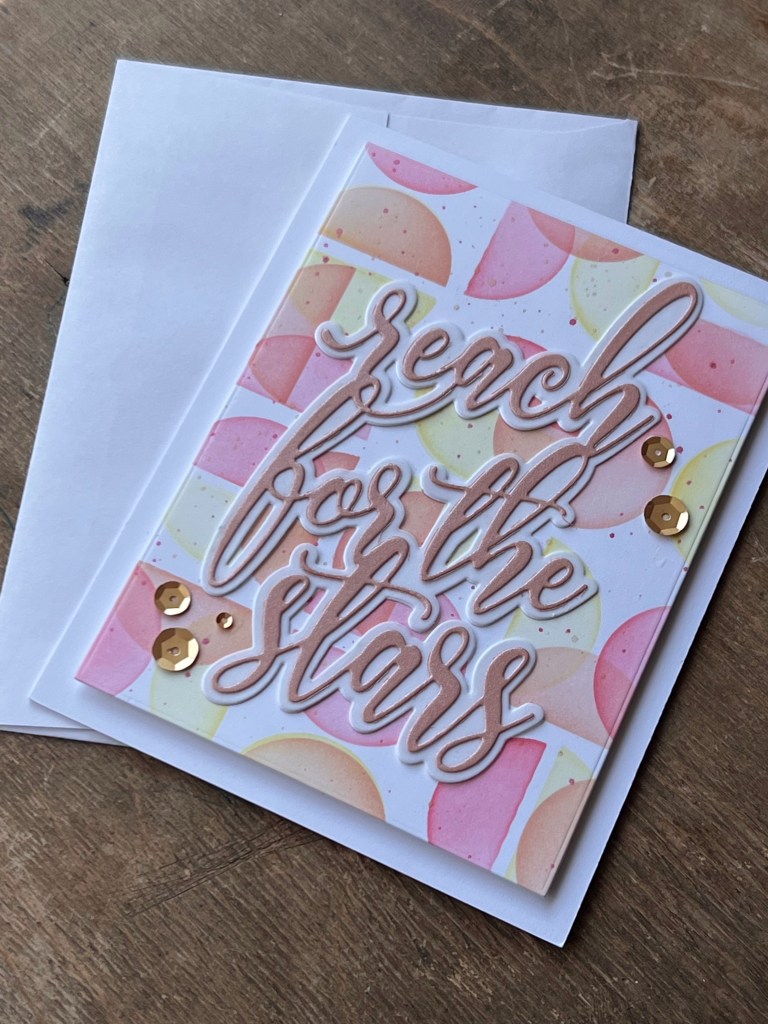
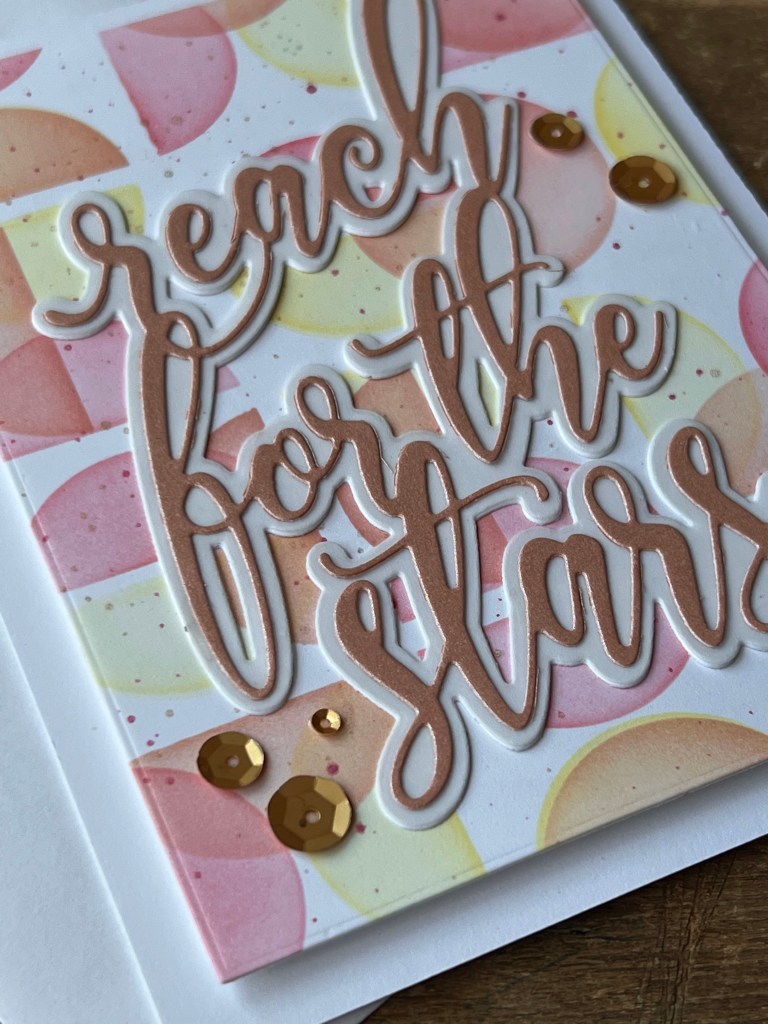
This top folding A2 card started with using the stencil and inks to create a fun soft feminine feel. Using the corner of my Media Mat i lined up the stencil, centred the card panel under it and blending each colour once time. After each colour I rotated the stencil 1 turn to the right and used the next colour. Then rotated it one more time and used the final colour. I like that the over lapping colours created new colour blends all within the same family of colours. Once the panel was dry I smudged some crimson and gold ink onto the watercolour mat, spritzed a little water on to the ink, and used a fine paint brush to pick up the colour and splatter it onto the panel. While I waited for that to dry I cut out the sentiment from the Rose Shimmer cardstock and the shadow from the Neehah 80lb. I cut the panel to 3 3/4 x 5 inches with a Waffleflower die and popped up the whole panel on the card base with three pieces of recycled cardstock (they have opsies on them) for some dimension. The finishing touch is a little bling from some gold satin sequins.
Card #4
Supplies For This Card
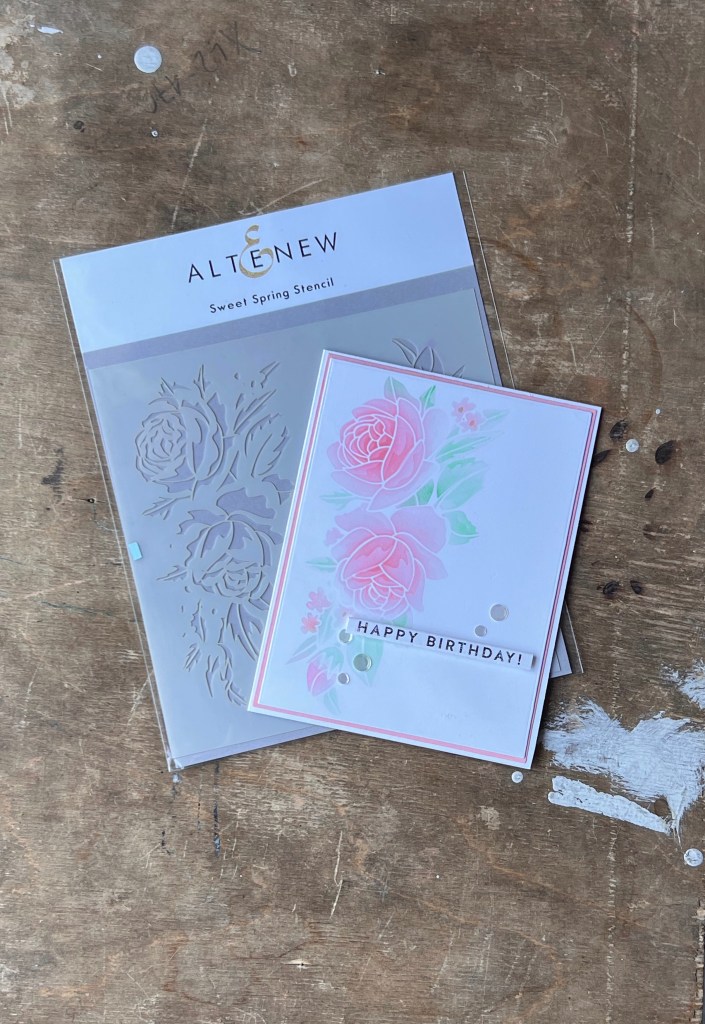
- Altenew Sweet Spring Stencil
- Altenew Mini Blending Brushes
- Altenew Detailed Blending Brushes
- Altenew inks
- Rouge
- Crimson
- Sweet Leaf
- Just Green
- Simon Says Stamp Moonshine Confetti
- Simon Says Stamp Sentiment Strips – Bold Birthday
- Gina K Sparkling Silver Fancy Foil
- Waffleflower A2 Layering dies
- Waffleflower Additional A2 Layering dies
- Waffleflower mini Media Mat
- Creative Memories Pink Lemonade 65lb Cardstock
- Accent Opaque 100lb Cardstock
- Neenah Solar White Classic Crest 80lb
- Swingline Laminator
- Sizzix Big Shot
- Altenew Instant Dimension Foam Tape
- Art Glitter Glue liquid adhesive
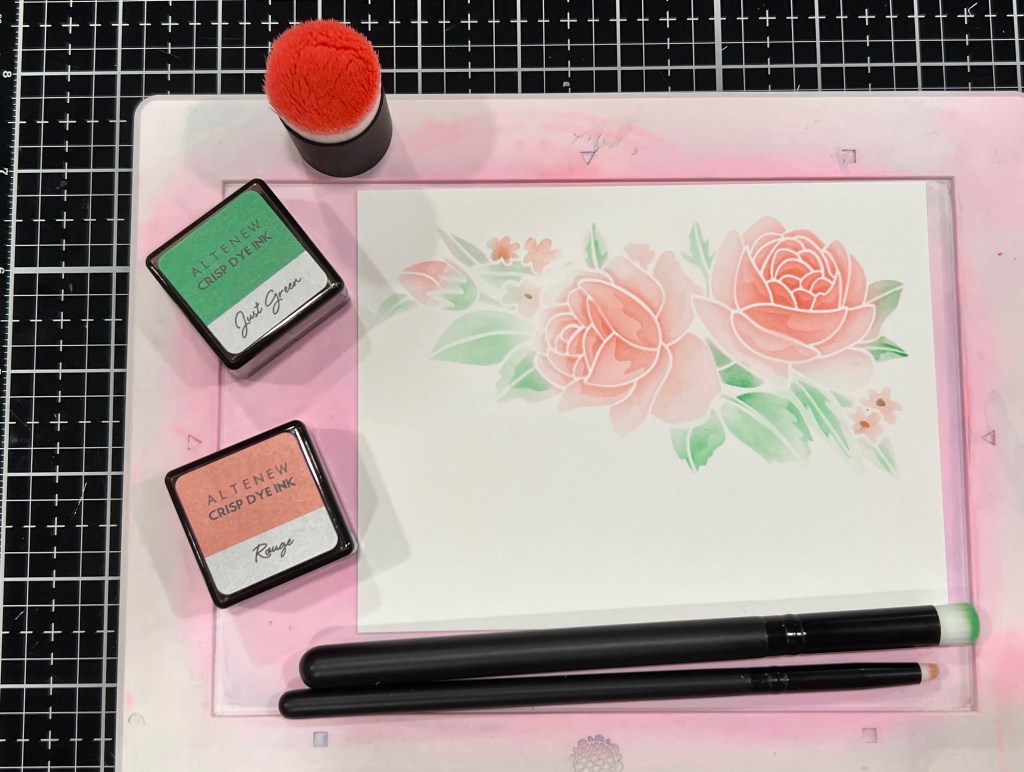
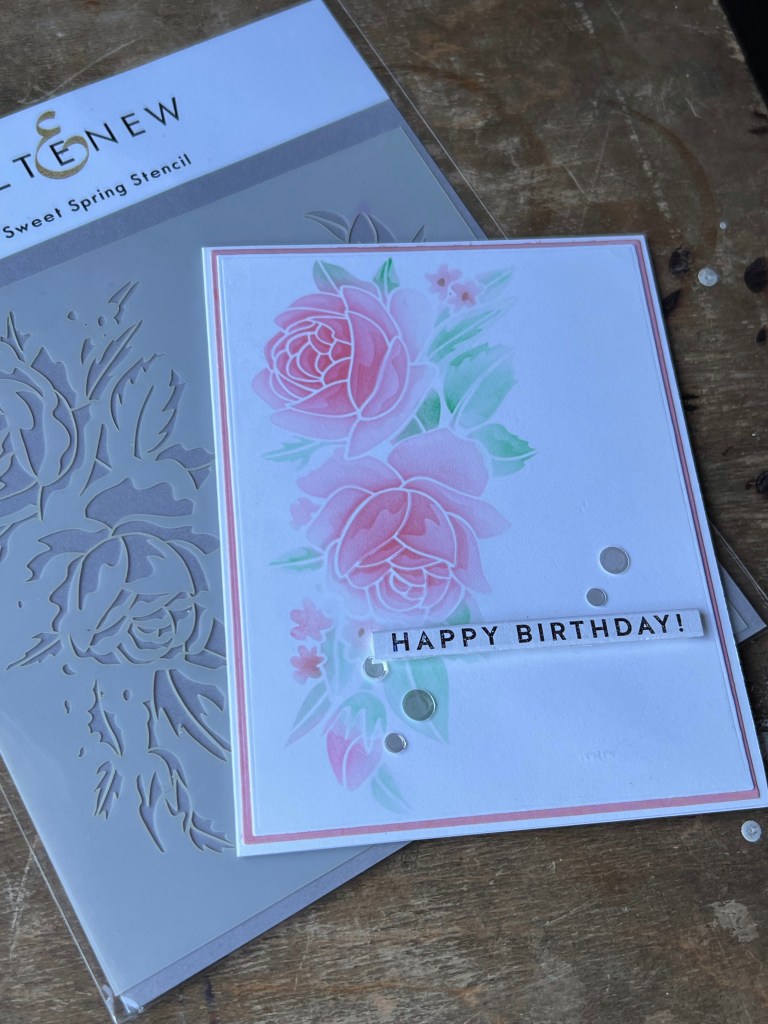
For this A2 side folding card I was aiming for a clean and simple look that was on the elegant side. I kept the colours very soft by ink blending with the Altenew mini blending brush and a light hand. By masking off areas to keep colours separated and using the detailed brushes for small areas I was able to get multiple colours in open design stencil. I cut the blended panel with the 5 1/4 x 4 inch Layering die and cut the pink panel with the 5 3/8 x 4 1/8 inch die from the Additonal Layering set. Using a sentiment from the Bold Birthday set I foiled it with my laminator using some Gina K Silver Foil. The finishing touches are popping the sentiment up with some foam tape, adding some sparkle with the Moonstone confetti and adhering it to the Accent Opaque, A2 card base.
Card #5
Supplies For This Card
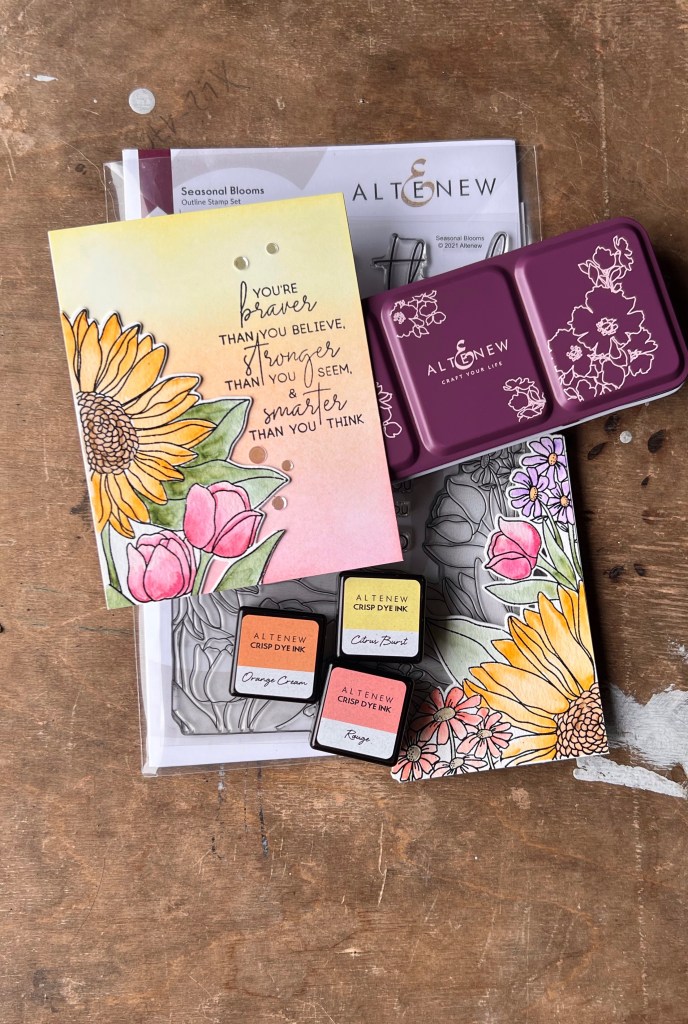
- Altenew Seasonal Blooms Stamp & Die Set
- Altenew Blending Brushes
- Altenew Artists’ Watercolour 24 Pan Set
- Fiery Sunset
- Cherry Blossom & Pure White
- Delectable Delights
- Green Hills & Tropical Forest
- Altenew inks
- Crimson
- Orange Cream
- Citrus Burst
- Jet Black
- Versafine Black Onyx Ink
- Simon Says Stamp Fine Detail Clear Embossing Powder
- Simon Says Stamp Moonshine Confetti
- Waffleflower mini Media Mat
- Misti Stamping Platform
- Accent Opaque 100lb Cardstock
- Neenah Solar White Classic Crest 80lb
- Canson XL Watercolour Paper 140lb
- Sizzix Big Shot
- Art Glitter Glue liquid adhesive
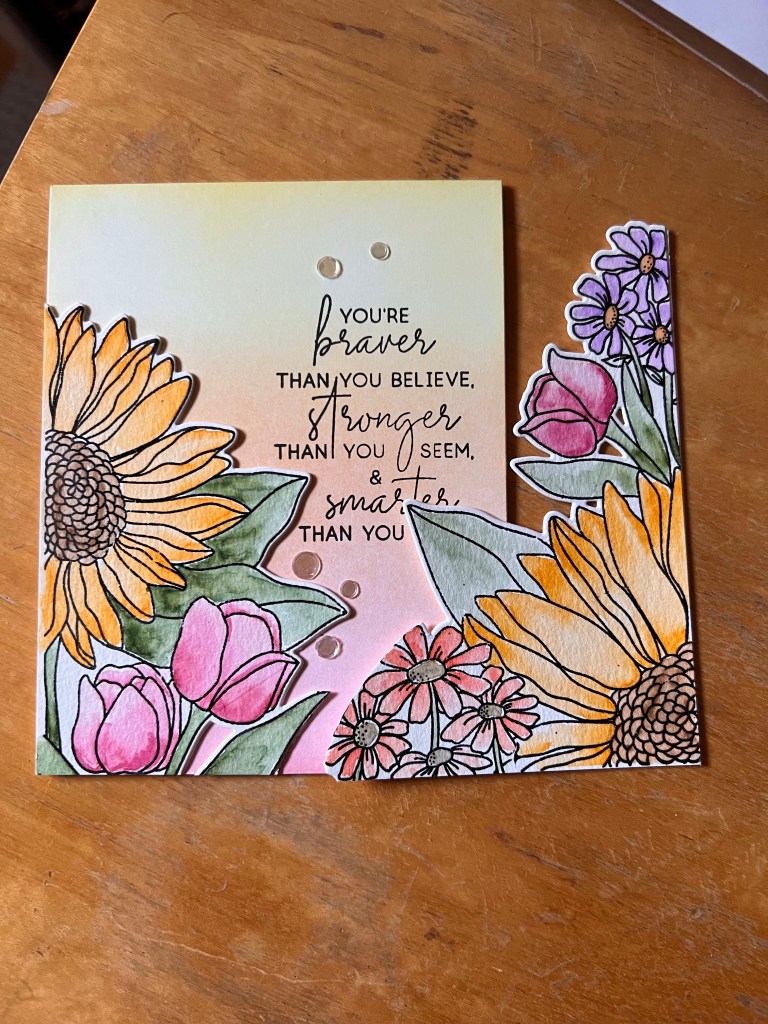

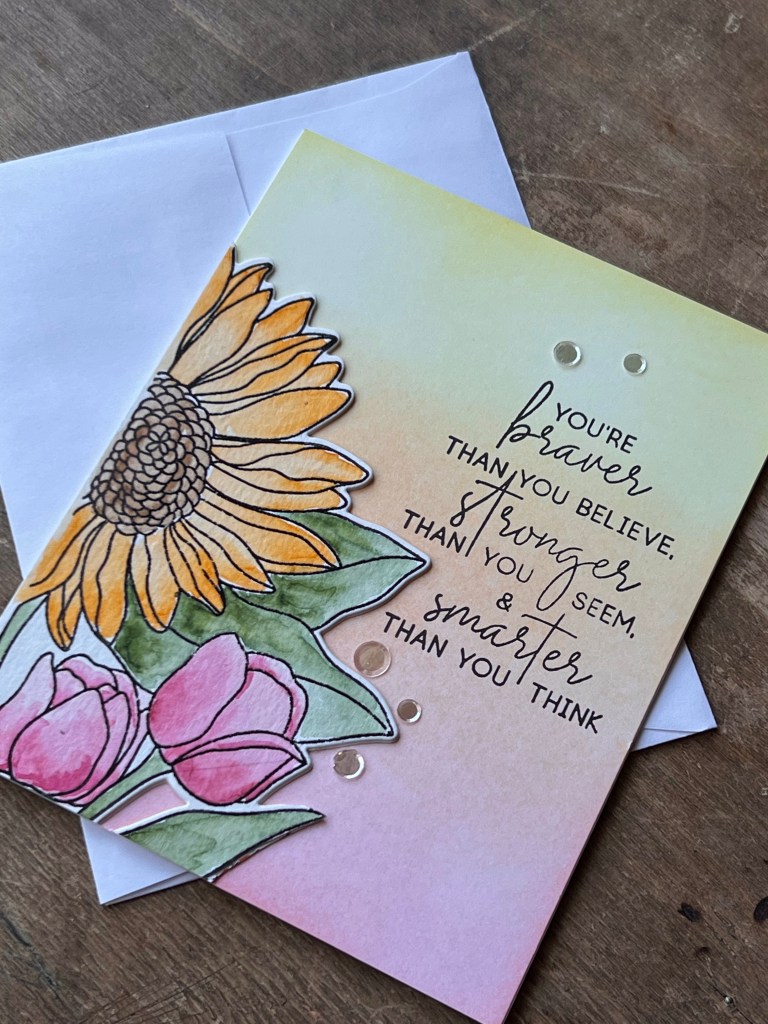
This card may be one of my favourites quite honestly. I love how well the Altenew inks blend and soften. This is an A2 top folding card that was made in three parts, the floral watercolour, the blended panel, the stamped sentiment and final touches. I stamped the floral image on some Canson XL watercolour paper with Versafine ink, sprinkled clear embossing powered over it and melted it with a heat tool until shiney and melted. I then did some simple painting with the Altenew watercolour paint set and set it aside to dry. Using a 4 1/4 x 5 1/2 inch of 80lb Neenah and the large blending brushes, I did a soft blend of inks to mimic the colours on the painted piece. After die cutting the floral piece I fussy cut it apart to create two pieces. I cut a second piece from scrap cardstock to layer it up for dimension. Before I attached it to the base I played with positioning for the sentiment (this is where a stamp platform is so dang handy!), once I was happy with placement i stamped the sentiment form the same set with Jet Black ink. I attached the floral piece with liquid adhesive and trimmed off the excess with a pair of sharp, long bladed scissors. Using my Misti I put the card base into a corner and line up the finished panel into the same corner so they match up perfectly. This is a handy way to line up a full panel on a card base and not get bits that hang off the top edges! The final touch of course is a bit of bling with some Moonstone Confetti.
The Gift Box
Gift Box Supplies
- Altenew Tall Foliage Stamp, Stencil & Die Set
- Altenew Inside and Out: Thanks stamp set
- Altenew inks
- Jet Black
- Crimson
- Rouge
- Forest Glades
- Nuvo Moonstone Glimmer Paste
- Recollections Black 110 lb cardstock
- Creative Memories DSP
- Neenah Classic Crest 80lb
- ScorePal
- Double Sided Adhesive Tape 1/8”


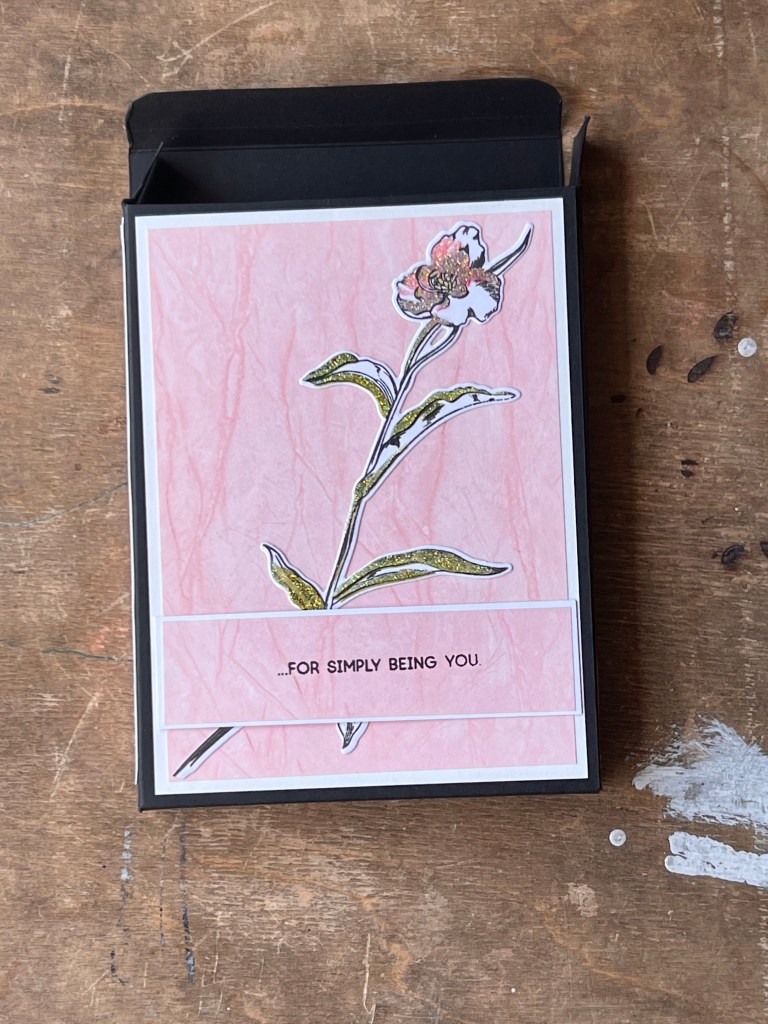
- I tried a few other box ideas with recycled materials but I just wasn’t happy with the clunky feel of what I came up with. So like any sensible crafter off to YouTube I went! I’m so glad I found this amazing Gina K video because I knew I’d be able to follow her directions and make something iI would be happy with. Here is the link https://youtu.be/bLY19gWt5Gs to her video. I made a few small adjustments to my notes as I did try a couple of practice pieces first. I used one of the Tall Foliage stamped and die cut pieces for the front of the box to tie the theme together. I stamped a sentiment from the Inside and Out : Thanks on the patterned paper and matted it on white cardstock. The measurements for this part really are whatever works for your sentiment and final look you want to achieve.
- A sturdy piece of 8 1/2 x 11 cardstock in your choice of colour
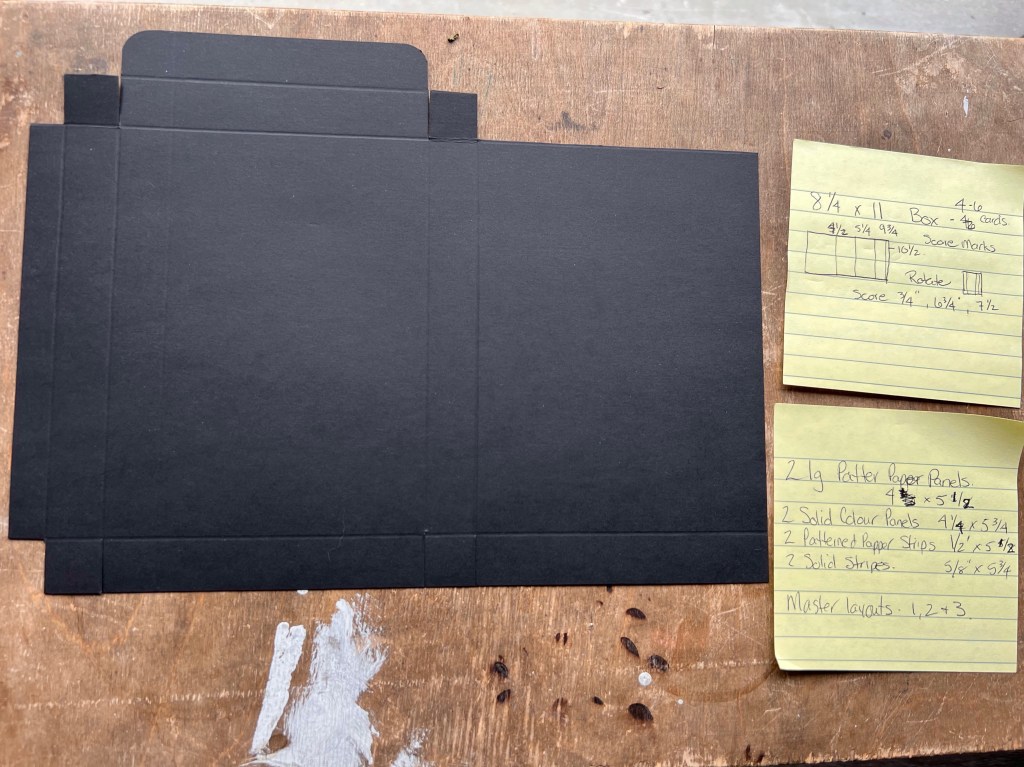
- Two – 4” x 5 1/2” Patterned Paper Panels
- Two – 1/2” x 5 1/2” Patterned Paper Strips
- Two – 4 1/4” x 5 3/4” Solid Colour Panels
- Two – 5/8” x 5 3/4” Solid Colour Strips
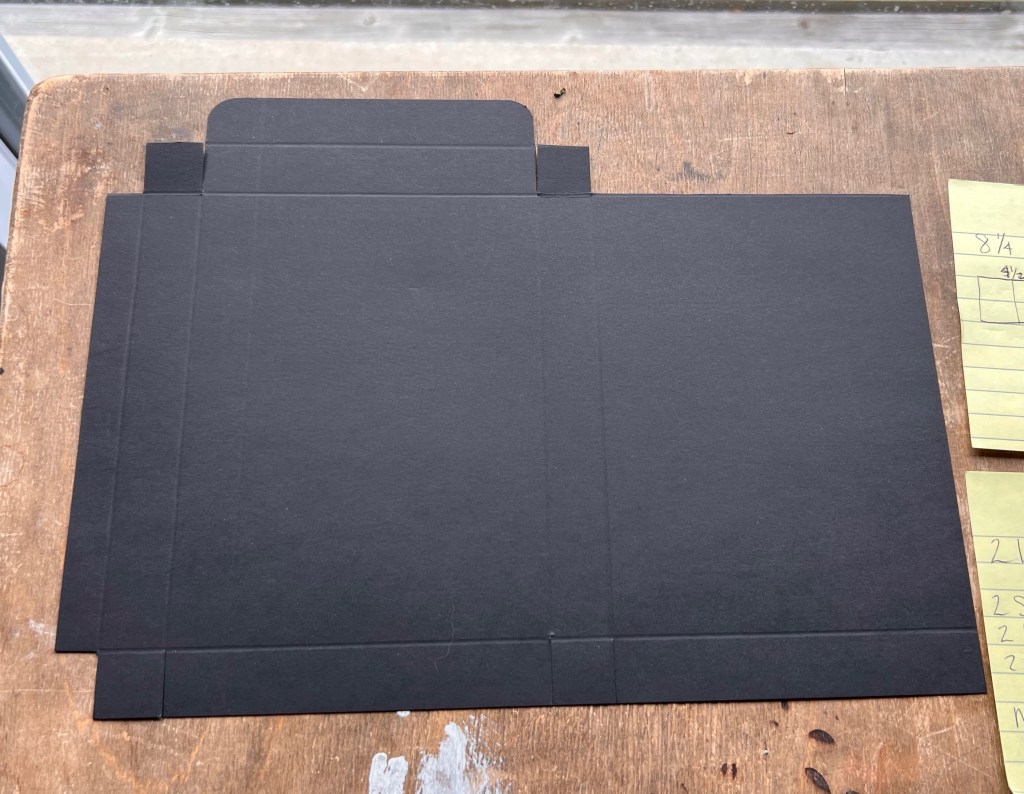
- Cut your sturdy cardstock to 8 1/4” x 11”. First score along the following numbers on the long side. 4 1/2”, 5 1/4”. 9 3/4” & 10 1/2”. Rotate the paper to the short side and score at 3/4”, 6 3/4” & 7 1/2”
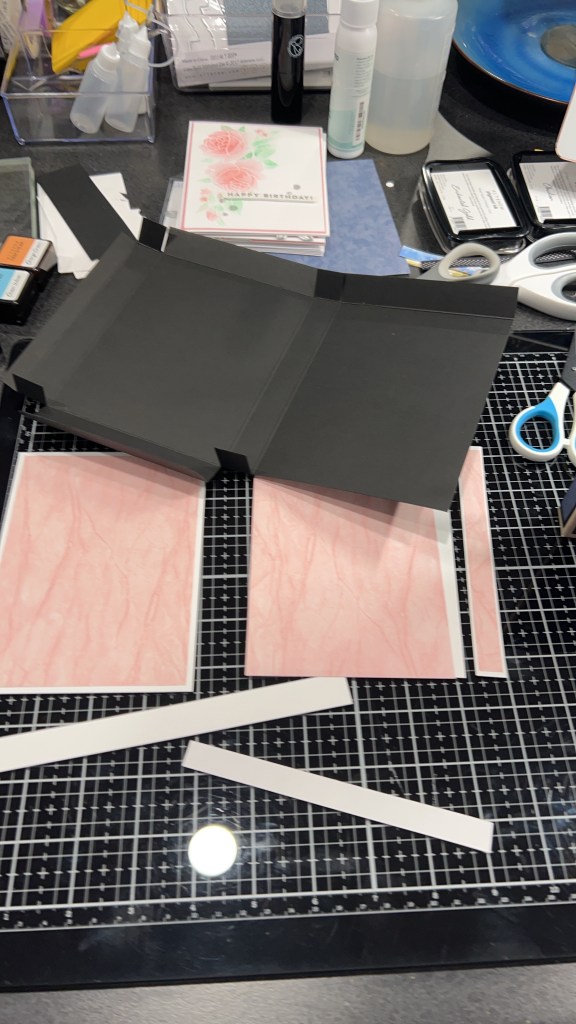
- For the rest of the directions I highly recommend following the link to Gina’s video. I found that a visual guide is much easier to follow for the cutting part of this project!! I like to use a 1//8” double sided tape for putting the boxes together, tho it can be done with what ever adhesive you are most comfortable with.

These are all so lovely! Extraordinary application of techniques. I think my favorite one is the stenciled Happy Birthday card (#4) I really like the soft ephemeral look of it
LikeLike
Thank you very much! I appreciate the feel back and you visiting my blog!
LikeLike
Beautiful cards, Kim! You did a terrific job, well done. I love each and every card you have created and the colors you have used too! Bravo!
LikeLiked by 1 person
Thank you Erum! I really enjoyed making all of the cards for the challenge.
LikeLike